Credits: this exercise closely follows CSTR’s multisyn voice building recipe
Log in- Tools requiredOnly needed if you are setting this exercise up on your own. Edinburgh students should skip this step.
- A working Python installation (exercise tested with versions 2.7 and 3.6 but should be fine with other versions)
- Festival (use the latest version), plus
- Edinburgh Speech Tools (from the same place as Festival), compiled with the Python wrappers
- Various libraries (see Festival / Edinburgh Speech Tools documentation for dependencies) including lib32ncurses5-dev and libX11-dev
- HTK (if you use 3.4.1 then fix this bug related to ERROR +8522)
- sox
WARNING: setting this exercise up on your own machine is non-trivial! It requires advanced skills in compiling code from source. This page is only intended to help experts set up machines for summer school courses.
- IntroductionAn overview of the complete process of voice building, and some tips for success.
In this practical exercise, you’re going to build a unit selection voice for a text-to-speech synthesiser from your own voice. You will create a working voice that can be loaded into Festival and used to generate intelligible speech.
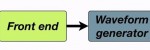
This exercise focuses mainly on the waveform generator stage of the synthesis pipeline, although we may make some minor changes to the front end, by adding a few words to the pronunciation dictionary.
Before starting, be a proper engineer and
- keep a logbook to record every single step
You’ll find this invaluable if you need to repeat any steps, and your notes will also be useful for writing up a lab report at the end.
To build your synthetic voice, you will follow step-by-step instructions and use a variety of existing tools. If you’re doing this exercise on your own, you now need to download and install Festival and HTK. This exercise was originally developed for Mac OS X but also works on Linux. Don’t attempt to do this exercise on Windows, unless you are a masochist.
Here are the main stages in this exercise:
- Select a recording script.
- Make the recordings in the studio.
- Prepare the workspace.
- Prepare the recordings in the required format, and sanity check.
- Label the speech.
- Pitchmark the speech.
- Build the voice.
- Evaluate the voice.
- Write up.
Each stage will be described, and I’ll also provide links to relevant material on this website, such as blog posts describing some part of the theory, or discussion forums where I answer students’ questions.
Related posts
Related forums
-
- Forum
- Topics
- Last Post
-
-
Speech Synthesis
This forum is relevant for both the Speech Processing and Speech Synthesis courses.
- 264
- 3 weeks, 3 days ago
-
Speech Synthesis
- Prepare your workspaceWe're going to be generating quite a lot of different files, so we need a well-organised workspace in which to keep them.
I’m going to assume that you’ll put everything in your Documents directory. Download this zip file, unzip it (you might find that it is unzipped automatically after download) and move the resulting “ss” folder to your Documents folder. Open a Terminal and check that everything looks OK.
bash$is the bash prompt (yours may look different).bash$ cd ~/Documents bash$ cd ss bash$ ls
and you should see three folders (
pm,recordings,wav) and three files (setup.sh,utts.data,utts.pauses).If you installed all the tools needed for this exercise yourself, you now need to edit the two paths in
setup.sh. The variableSSROOTDIRshould point at the root directory of your installed tools, andFROOTDIRshould point at the Festival installation within there.Every time you open a new Terminal to work on this exercise, you need to run the setup.sh script. Let’s do it now:
bash$ source setup.sh
You won’t see any output, but various environment variables have been configured for you. By the end of the exercise, you’ll have more folders than this; here’s the complete list:
Folder Contains recordings speech recordings, copied from the studio wav individual wav files for each utterance pm pitch marks mfcc MFCCs for use in automatic alignment lab label files from automatic alignment utt Festival utterance structures f0 Pitch contours coef MFCCs + f0, for the join cost coef2 coef, but stripped of unnecessary frames to save space, for the join cost lpc LPCs and residuals, for waveform generation - MilestonesTo keep on track, check your progress against these milestones. Try to stay ahead of them if you can.
- Friday, 26 January 2024
-
-
Speech Synthesis - milestone AFriday, 26 January 2024
Built a voice from existing ARCTIC data (e.g., slt). Worked through individual steps of voice building, starting to understand them in detail. Investigated relative weighting of target cost versus join cost.
Booked your studio training session.
-
- Friday, 02 February 2024
-
-
Speech Synthesis - milestone BFriday, 02 February 2024
Learned how to make recordings. Started your recordings of ARCTIC A. Decided whether to do automatic script selection, or a manual design.
-
- Friday, 09 February 2024
-
-
Speech Synthesis - milestone CFriday, 09 February 2024
Completed recording of ARCTIC A script. Fully understood the do_alignment script. Selected your limited domain. For automatic script selection, identified a source of text to select from.
-
- Friday, 16 February 2024
-
-
Speech Synthesis - milestone DFriday, 16 February 2024
Built a voice from your own ARCTIC A recordings. Implemented your automatic script design algorithm, or manually created your additional script.
-
- Friday, 01 March 2024
-
-
Speech Synthesis - milestone EFriday, 01 March 2024
Completed all recordings, including your own additional material. Fully understood all the design choices in building a voice. Explored the effect of several design choices (e.g., pitch marking and F0 estimation accuracy). Multiple voices built (e.g., from various subsets of your data or with difference design choices).
-
- Friday, 08 March 2024
-
-
Speech Synthesis - milestone FFriday, 08 March 2024
Final listening test design started. Decided on method for implementing the test (e.g., online). Made decision about final set of voices required to test your hypotheses. Started building those voices. Identified and fixed one label alignment error.
-
- Friday, 15 March 2024
-
-
Speech Synthesis - milestone GFriday, 15 March 2024
Listening test designed and implemented. Pilot listening test with one or two listeners completed.
-
- Friday, 22 March 2024
-
-
Speech Synthesis - milestone HFriday, 22 March 2024
Listening test underway. Continued experimentation to explore design choices.
-
- Friday, 29 March 2024
-
-
Speech Synthesis - milestone IFriday, 29 March 2024
Optional small follow-on listening test designed. Decided which hypotheses and experiments will feature in your lab report. Selected an evaluation method for each, which will be a listening test in some cases, but not all.
-
- Friday, 05 April 2024
-
-
Speech Synthesis - milestone JFriday, 05 April 2024
Completed draft write-up.
-
- Thursday, 11 April 2024
-
-
Speech Synthesis Milestone: Coursework Due 12 noonThursday, 11 April 2024
Confirmed date for 2024: Thursday 11th April
-
- The recording scriptBecause unit selection relies so heavily on the contents of the database, we need to think carefully about exactly what speech we should record.
We need to select a script for recording. The standard method for this involves greedily selecting sentences, one by one, from a large text corpus (e.g., novels or newspapers) in order to maximise phonetic (and possibly prosodic) coverage. In the first part of this exercise, we will simply use the existing CMU ARCTIC script.
This would result in about one hour of speech if you record the whole thing, but I suggest you start by recording only the ‘A’ set of 593 prompts and build a voice from those. You can go back and record the ‘B’ set later if you wish, or you could spend that time recording more of your own material, or on other improvements or evaluation.
Because recording will take a little time (around 5 hours in the studio per hour of speech material obtained), you should get started on recording the ARCTIC sentences immediately, and design your additional sentences in parallel.
Tip
You can get started before your recordings are ready, by downloading one of the ARCTIC corpora (I recommend ‘slt‘). These are actually complete Festival voices, so you should simply copy only the waveforms into the ‘wav’ directory of your ‘ss’ directory (and discard everything else), then proceed with this exercise. You should work in separate copies of the ‘ss’ directory for each voice you build.
If the download is slow, then you can copy the waveforms from our local copy of ARCTIC like this:
bash$ rsync -avu /Volumes/Network/courses/ss/corpora/ARCTIC/cmu_us_slt_arctic/wav/ ~/Documents/ss/wav/
Log in- The utts.data fileThis file is the main index of the unit selection database. Festival uses it to discover which files it can select units from.
You will find a file called utts.data in your ss folder. This is the file that Festival uses to define the unit selection database. The initial version of this file contains the CMU ARCTIC sentences.
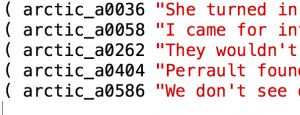
The utts.data file looks like this:
( arctic_a0001 "Author of the danger trail, Philip Steels, etc." ) ( arctic_a0002 "Not at this particular case, Tom, apologized Whittemore." ) ( arctic_a0003 "For the twentieth time that evening the two men shook hands." )
Each line of the file represents one utterance in your database, in the following format:
- An opening parenthesis ‘(‘
- A unique identifier which will be used as the filename for any files which relate to this utterance. The ARCTIC sentences use filename of the format arctic_lnnnn; your own supplemental material should used identifiers of the format yourname_nnnn (where nnnn starts again from 0001)
- The text, inside double quotes
- A closing parenthesis ‘)’.
- Adding your own materialWhilst the ARTIC script gives general diphone coverage, it's not ideal for synthesising all types of sentence. You can try to improve your voice's naturalness for one particular domain, by adding more material to the database.
The ARCTIC prompts come from old novels, and were selected under constraints described in the technical report, which means that they don’t give very good coverage of common short phrases, such as greetings. You can therefore supplement the ARCTIC script with some of your own material.
If you are able to code, then you can skip this section and move on to the next section which covers automatic text selection in which you will write your own algorithm to select the text to record.
If you can’t code, then you can add some prompts to cover the following:
- 5 sentences which include your name in different contexts (e.g., phrase-initial and phrase final);
- 10 short frequently-used set-phrases such as “Hello.”, “Hi.”, “How are you?”, “Goodbye.” and so on;
- about 50 sentences aimed to cover a very small limited domain.
Choose a limited domain where you can include all the words in the vocabulary items several times each (in different contexts and positions) within just 50 sentences, but from which you are able to synthesise a much larger range of new sentences. For example:
- Times and dates.
- Street addresses, with a very small set of street names (e.g., North Street, North Avenue, West Street, …) and a few numbers.
Invent your own domain, and don’t use one of those examples! It’s fine to artificially restrict the vocabulary and types of sentences: it’s just an exercise, after all.
After you design your additional material, prepare a new file in the same format as utts.data, containing your sentences – this file will be used by the SpeechRecorder tool to record those sentences. Number the sentences in a meaningful way, with your name and a unique number, in a similar way to the main scripts. You do not need to include the ARCTIC script: that is already loaded into SpeechRecorder. In addition, you need to add your new sentences to the end of the utts.data file.
Important: use a plain text editor (such as Aquamacs) to make those files – you must avoid non-ASCII characters.
- Automatic text selectionNot all students will attempt this, but how about implementing your own greedy text-selection algorithm?
Note: this part of the exercise will require some basic coding skills (e.g., in Python).
Instead of, or as well as, adding a small set of handcrafted sentences from a limited domain, you can implement a simple text-selection algorithm and use that to select your additional material.
The most advanced version of this is to select an additional set that is the same size (in terms of recorded speech) as the ARCTIC ‘A’ set. You can then build voices from ARTIC ‘A’ or from your material, and compare them in a listening test.
Remember that you’ll also need to record this material in the studio! Make sure to record under exactly the same conditions (same studio, same microphone, etc) in all of your recording sessions, so that you have the option of combining the data to build a single voice.
Some ideas to get you started:
- You could try to exactly replicate the ARCTIC text selection algorithm, or try your own ideas.
- You could use much more up-to-date source text, instead of old novels.
- If you select from limited domain source text, then you should be able to build a really good domain-specific voice. One challenge will be finding a suitably large body of such text (e.g., scrape the web for sports reports).
- The utts.data file
- Make the recordingsWith our carefully chosen script, we now need to go into the recording studio and ask our voice talent to record it. Consistency is the key here, especially when the recording is done over multiple sessions.
Practice makes perfect, so you need to allow a little time for learning how to make good recordings. If you are using a recording studio, you will work with a partner, one of you acting as recording engineer whilst the other is the voice talent. If you are recording at home, you will do both jobs yourself.
For 2023-24, students should use the University recording studios: instructions are below.
Microphone technique
Good technique is important for high quality recordings, and always remember that consistency is crucial, so take a few photos of the setup so you can reproduce it in subsequent sessions.

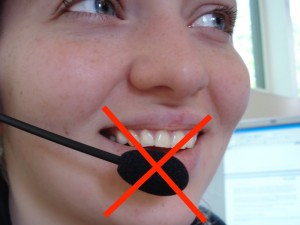
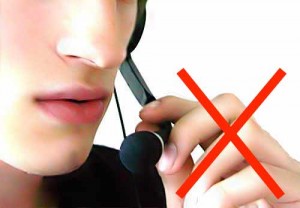
With a headset microphone, it’s important to place it to one side of the mouth to avoid breath noises
don’t place it below the mouth because you will still get breath noises from the nose
and don’t touch it whilst recording!
With a stand-mounted microphone, again you need the microphone placed to avoid breath noises from the mouth or nose, and kept at a constant distance (20-30cm). Make several test recordings to find a position that sounds good. During the recording sessions, the engineer should keep an eye on your voice talent: don’t let them move around in the chair.
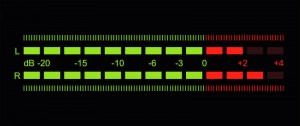
Getting the recording level correct
With digital recording, it’s essential that you never ‘hit the red’ when recording because you will get hard clipping and that will sound very bad (as well as potentially interfering with the signal processing we need to do later).
But on the other hand, you do want to record at the highest level possible (what a recording engineer would call ‘hot’) so that you make the most of the available bit depth. Recording at too low a level is equivalent to using fewer bits per sample, and can also make any imperfections in the audio signal chain (such as electrical noise within the microphone amplifier) more obvious.
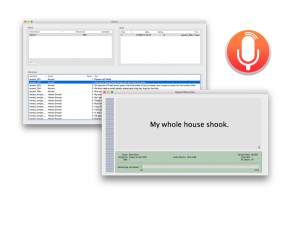
Recording software
If you’re recording on a Mac, then you can use CSTR’s SpeechRecorder software that presents each prompt to the voice talent, and saves the recordings in individual files. Here’s the manual. To load your own sentences into this tool, they need to be in Festival’s standard ‘utts.data’ format.
If you don’t have a Mac, then try this Python alternative to SpeechRecorder created by previous student Tim Loderhose, and now updated and maintained by Dan Wells.
Making good, consistent recordings
You will find that you can probably record for a maximum of 2 hours at a time, with short breaks every 30 minutes or so. After that your voice will start to become creaky. Stop when this happens: you need your voice to stay consistent (it may also be damaging to your voice to speak for excessively long periods). Some recording tips:
- Switch your phone, and that of anyone else in the studio, off or place it in ‘airplane’ mode (not just silent mode) to avoid interference.
- Take a bottle of water with you and take frequent sips during recording.
- Write down (or take a photos of) the recording levels you are using and set the same levels in every session.
- Ensure chair, microphone, etc. are positioned the same way in every session (again, photos are helpful here).
- Make sure any ventilation fans are switched off during recording.
- When you are speaking, ensure that you are not fidgeting, playing with any of the cables, your hair, etc…
Of course, you should make plenty of test recordings at the outset, and listen back to them carefully over headphones to spot any problems. Once you have perfected your technique, go ahead and record the ARCTIC ‘A’ set. You should build a voice from this, to confirm that you have made sufficiently-good quality recordings, before returning to the studio to record your own material.
During the actual recording, try to get each sentence correct in a single attempt. Don’t waste time on multiple takes, except in those few cases where you made a major error. The engineer should keep notes about any sentences that need checking after the recording session.
At the end of each session, make back up a copy of your recordings on a memory stick (if using a recording studio), and/or back them up somewhere secure.
Log in- Using the University recording studiosThe University has two recording studios available for you to use.
Step 1: read this
Studios
You will be allocated to one of the two available studios and should use the same studio to make all your recordings. The microphone and other equipment may differ between them, which will make the recordings sound different. You do not want to build a unit selection voice from data with varying recording conditions.
Training is provided for groups of up to 3 students
You need to attend a training session with the studio technician or a tutor, for the studio you have been allocated to. You must complete this training before making your recordings.
Form a group of 3 students who will attend one training session together. Appoint one student to be the leader. The leader should check the availability of everyone in the group, then check the available training sessions for the appropriate studio, then book a training session.
Recording is done by pairs of students
For recording, you just need to form pairs. One of you will be the Voice Talent, and the other will be the Engineer. Then you’ll swap places. If you really want to stay in your group of 3 from training, you can do that, but it’s more efficient for form pairs.
Do you have a DICE account?
To view the booking system for the Informatics Forum studio, you (or your recording partner) needs a DICE (Informatics computing system) account. If neither of you has one, please switch over to the Appleton Tower studio.
Step 2: book a training session
Appleton Tower
- Check the available training sessions here (make sure to look at the “Appleton Tower” tab of this workbook)
- Send an email to the PPLS Studio Technician ppls.studio@ed.ac.uk with subject “Speech Synthesis training session booking request (Appleton Tower)”. List all the sessions that your group is available for. The Studio Technician will enter your group into the sheet above, and confirm by email.
- Your studio is located in the basement of Appleton Tower.
Informatics Forum
- Check the available training sessions here (make sure to look at the “Informatics Forum” tab of this workbook)
- Send an email to the Tutor Atli Sigurgeirsson <A.T.Sigurgeirsson@sms.ed.ac.uk> with subject “Speech Synthesis training session booking request (Informatics Forum)”. Specify all the sessions that your group is available for. The Tutor will enter your group into the sheet above, and confirm by email.
- Your studio is located in the basement of the Informatics Forum. You will need to sign in at reception in order to enter this building. Then proceed down the stairs which are in the middle of the atrium.
Step 3: book recording sessions
Do not book any recording sessions until you have completed the training session!
Once you are trained, you may book a recording session in your studio. In order to maximise availability of the studios for everyone, each booked session should be a maximum of 2 hours in duration. Quickly cancel any booking that you no longer require.
Appleton Tower
- Check availability and make a booking yourself on the PPLS Appleton Tower booking system – this requires EASE authentication
- For Project title, write “Speech Synthesis recording”
- For Full description, list the people who will take part in the session
- Type: internal
- For Email Address, write the email address of the person making the booking, in s1234567@ed.ac.uk format
- Consent has been obtained: tick
- For Full Name, write the name of the person making the booking
- Booking is for Internal PPLS use of the studio: tick
- Each recording pair may hold a maximum of two hours (i.e., 1 x 2-hour, or 2 x 1-hour) of future bookings at any time.
Informatics Forum
- Check availability on the Informatics Studio booking system (Areas > Sound Studios > Hemi-Anechoic Chamber) – this is only accessible from within the University network (including via the VPN) and requires a DICE account. Available slots are marked with “Available to book for Speech Synthesis” or are empty. You may only use this studio between 09:00 and 17:00 on weekdays.
- Email a booking request from your University email account to Simon.King@ed.ac.uk with subject “Speech Synthesis recording session booking request (Informatics Forum)” in which you
- list all the people who will take part in the session (student number + full name)
- list possible dates/times/durations of the slot(s) you want, in order of preference
- Simon will book the first available slot(s) from your list, and confirm by email
- Each recording pair may hold a maximum of two hours (i.e., 1 x 2-hour, or 2 x 1-hour) of future bookings at any time.
- Create a studio at homeIf you don't have access to a recording studio, it's perfectly possible to make good quality recordings at home.
Environment
It’s obvious that you’ll need somewhere quiet, but it’s equally important to reduce reverberation (reflection of sound from surrounding surfaces).
Bad:
- Hard floors such as wood or tiles
- Bare walls
- A desk or table with a large horizontal surface
Good:
- Carpet or rugs
- Soft furnishings such as a bed, sofa, heavy curtains
Best:
- Create a mini-studio by arranging sound-absorbing objects behind and around the microphone.
- A simple option is to open your wardrobe doors. Place the microphone inside the wardrobe (not touching any clothes) and record facing into it.
- Another option is to arrange cushions in a box shape and place the microphone inside.
- You are trying to make something that works like this or this without spending any money.
Microphone
You generally don’t want to use the microphone built in to your laptop. The laptop is a source of noise, and you’ll also find it hard to get it into a convenient close-talking position.
A surprisingly good option is the microphone built in to wired Apple iPhone earbuds (the type with a 3.5mm 4-ring jack connector), which will plug in to a Mac’s headphone socket. You’ll need a way of mounting it in a suitable position (do not hold it in your hand, or use it hanging from your ear – it will move about). You could use an elastic band to attach it to a suitable object such as a tall bottle. Other brands of similar microphone might also be good, although we haven’t tested any.
If you don’t have one of those Apple microphones, you need some other external microphone. Unless you really know what you are doing (in which case you probably don’t need this guide), this will be a microphone that connects directly to a USB port.
If you’re in the market for a new microphone for podcasting or videoconferencing, then the Blue Snowball iCE is excellent at that price point. Amazon’s Basics Desktop Mini Condenser Microphone is also very good value.
Be aware that some USB headsets produced specifically for video conferencing have a rather narrow bandwidth – make a test recording and inspect the spectrogram to find out.
Pop shield
Unless you have really excellent microphone technique, you are likely to get “popping” with plosive sounds, as a puff of air hits the microphone. The solution to this is a pop shield (also called a pop filter) but you can make your own then set it up like this.
If you don’t want to use a pop shield, then good microphone placement and voice talent technique is essential. One option is to suspend the microphone from above at eye level and speak so that your breath passes below it, but this will get in the way of reading a script. Another option is at or just below mouth level and slightly to one side. Experiment and make test recordings.
Laptop
You will probably be recording on to your laptop from an external microphone, and you’ll also be reading the prompts from the laptop screen. Try to place the laptop in a way that minimises noise picked up by the microphone. Use something sound absorbent to block the noise if necessary. As always, making test recordings with a variety of setups will help you decide what’s best.
Automatic Gain Control (AGC)
Some operating systems and/or audio hardware may have a feature which aims to continuously adjust recording volume levels automatically in response to how loud the sound reaching the microphone is. This is called Automatic Gain Control, and it may be switched on by default on your machine. This can work well for things like Zoom calls (though it can also cause problems when it doesn’t work properly!), but for recording speech data to build a speech synthesis voice it is bad for two reasons:
- continuously changing the recording gain could potentially introduce inconsistency into the recordings – for example, a short sequence of naturally loud phones may cause the following phones to be recorded quieter than they should be
- recording noise can be made louder at quiet points (the noise floor can be raised)
Therefore, it is important to make sure you don’t have AGC active when recording your own speech data. It does not seem this is a problem on Macs, but you’ll find online instructions for how to disable this on Windows and Linux (e.g. pulseaudio), for example:
- Prepare the recordingsMove your recordings into the workspace, convert the waveforms to the right format, and do some sanity checking.
Studio recordings use a high sampling rate (48 kHz or 96 kHz); this is unnecessarily high for the purposes of this exercise. 16 kHz will suffice and will make the files smaller and more manageable. Keep backups of the original recordings somewhere safe, in case you make a mistake.
Start by copying the original waveforms from the studio into the ‘recordings’ folder.
Choose amongst the multiple takes
In the studio, you probably made multiple attempts at a few of the more difficult sentences. It’s likely that the last take is the one you want (your engineer will have kept notes to help you), so you can move the other takes to somewhere other than the ‘recordings’ folder.
Sanity check
Before proceeding, make sure that you then have exactly one wav file per line in your utts.data file. Listen to all the files (Mac tip: use the Finder, navigate with the cursor keys, and use the spacebar to play each file). If you find any mismatches with the text (e.g., a substituted word), then an expedient solution is to edit the text (and not to re-record the speech). Also make sure that the file naming exactly matches utts.data.
The SpeechRecorder tool adds a suffix to the file basenames to indicate the ‘take’. You need to remove this so that the basenames exactly match the utterance identifiers in utts.data. Write a script to remove these suffixes (noting that the suffix might vary: “_1”, “_2”, etc. depending on which take you selected for each prompt).
In general, you should not re-record any utterances. A few missing utterances is not a major problem, for the purposes of this exercise.
Downsample
Here’s how to downsample a single file, and save it in the required RIFF format:
bash$ ch_wave -otype riff -F 16000 -o wav/arctic_a0001.wav recordings/arctic_a0001.wav
and you need to write a little shell script that does this to all the files in your ‘recordings’ folder. If you happened to record your data at 24bits instead of 16bits, you’ll need to use sox to change the bit depth, and you can downsample at the same time using sox instead of ch_wave:
bash$ sox recordings/arctic_a0001.wav -b16 -r 16k wav/arctic_a0001.wav
Now listen to a few of the files after downsampling, to check everything worked correctly.
Log in- EndpointingIf you have excessive silences at the start or end of many of your recordings, you might want to endpoint them. Only try this if your forced alignment does not give good results.
This part is optional. If you find that the forced alignment step does not give very good alignments, then try endpointing your utterances to remove excessive amounts of silence, then re-run the forced alignment. Here’s a script for end pointing.
for FILE in *.wav
do
   sox $FILE ../silenceTrimmed/$FILE vad -t 6 -s 0.1 -p 0.1 reverse vad -t 4 -s 0.1 -p 0.3 reverse
done
You’ll need to have two versions of your wav directory (before and after end pointing) and make sure that the ‘after endpointing’ versions are used in all subsequent steps, starting with the forced alignment.
Related posts
Related forums
-
- Forum
- Topics
- Last Post
-
-
Signal processing
Questions about feature extraction, time and pitch modification, or anything else we can do to speech waveforms.
- 44
- 6 months, 2 weeks ago
-
Signal processing
- Endpointing
- Label the speechThe labels are obtained from the text using the front-end of the text-to-speech system, but we then need to align them to the recorded speech using a technique borrowed from automatic speech recognition.
Before you continue, make sure you have completed the following:
- you have finished recording at least the ARCTIC ‘A’ set;
- you have a single
utts.datafile with a single line entry for each utterance; - you have checked your recorded data, and have a wav folder containing an individual
.wavfile for every utterance inutts.data; - you have checked to ensure the file naming and numbering is correct.
If you haven’t recorded the full ARCTIC script, then edit utts.data (obviously you should make a backup copy first) so that it only includes prompts for which you have a corresponding wav file.
The next stage is to create time-aligned phonetic labels for the speech, using forced alignment and the HTK speech recognition toolkit. First you must set up a directory structure for HTK:
bash$ setup_alignment
This creates a directory called
Log inalignmentcontaining various HTK-related files. The script will also tell you that you need to make a couple of files: you will do that in the next step.- Choose the dictionary and phone setVarious dictionaries are available, depending on your accent. The choice of dictionary also determines which phone set you will use. You might need to add some words to the dictionary, to cover all the words in your additional material.
You need to decide which accent of English your own speech is closest to. You have a choice between General American English, British English, or Edinburgh Scottish English. The choice you make here will determine which dictionary and phone set you need to use for the remainder of the assignment. All the instructions will assume you are using the British English dictionary
unilex-rpx, so if you choose to use a different dictionary you need to substitute unilex-rpx with one of the other options shown below, in all commands that include unilex-rpx.unilex-gam– General American Englishunilex-rpx– British English (RP)unilex-edi– Scottish English (Edinburgh)
Define the phone set
Copy the files which define the phone set to your alignment directory:
bash$ cp $MBDIR/resources/phone_list.unilex-rpx alignment/phone_list
bash$ cp $MBDIR/resources/phone_substitutions.unilex-rpx alignment/phone_substitutions
The
phone_listfile contains a list of phones in your phone set. There are some special phones included, as is common in automatic speech recognition. IfXis a stop or affricate, then aX_clis added to label the closure portion. The labelsp(short pause) is added for inter-word silences andsilfor longer silences (at the start and end of each utterance).The
phone_substitutionsfile contains a list of possible substitutions that the aligner is allowed to make. These are restricted to vowel reduction; e.g., the rule ‘aa @‘ means thataacan be labelled as@(schwa), if that is a more likely label, given the trained acoustic model.For your first voice build, skip the next optional step and instead create an empty dictionary. Here’s one way to do that:
bash$ touch my_lexicon.scm
Optional: dealing with words that are not in the dictionary
Since the forced alignment will produce phonetic labels from the speech and their word transcriptions, it needs to know the pronunciation of each word. In speech synthesis we would use letter-to-sound rules for all unknown words at runtime, but that isn’t accurate enough for labelling the speech data. Remember that any mistakes in the recorded database will have a direct effect on the synthetic speech. Therefore, you need to ensure that every word in your script is in the dictionary.
Checking your script against the dictionary
bash$ festival $MBDIR/scm/build_unitsel.scm
festival> (check_script "utts.data" 'unilex-rpx)
Festival will tell you about any out-of-dictionary words. It will also tell you what pronunciation the letter-to-sound rules predict, which may or may not be correct. If you find any out-of-dictionary words, create a file (in your preferred plain text editor, such as Atom) called
my_lexicon.scmwhich has this format:(setup_phoneset_and_lexicon 'unilex-rpx) (lex.add.entry '("pimpleknuckle" nn (((p i m) 1) ((p l!) 0) ((n uh) 1) ((k l!) 0)))) (lex.add.entry '("womble" nn (((w aa m) 1) ((b l!) 0))))include the first line, but remember to adjust the name of the dictionary to whichever one you chose earlier.
To work out the correct pronunciation for a word, start festival, run the
check_scriptcommand as above (which ensures that the correct dictionary is loaded), then use the commandlex.lookupto find the pronunciations of similar-sounding words to base your pronunciation on. If you have a strong non-native accent, don’t try to match the actual sounds you are using, but instead try to write pronunciations that are consistent with the pronunciations of other similar words that you would pronounce in the same way. You are aiming to be consistent across all the entires in the dictionary, rather than faithful to your own fine phonetic detail. - Time-align the labelsThe database needs time-aligned labels. Consistency between these labels and the predictions that the front-end will make at runtime is important, so we will use the same front-end to create the initial label sequence, then used forced-alignment to put timestamps on those labels.
The initial phonetic sequence for forced alignment comes from Festival, by running the script through the front end. Remember to change
unilex-rpxeverywhere, if you are using a different dictionary.Creating the initial labels
bash$ festival $MBDIR/scm/build_unitsel.scm ./my_lexicon.scm
festival>(make_initial_phone_labs "utts.data" "utts.mlf" 'unilex-rpx)
The output file
utts.mlfis created, which is an HTK master label file (MLF) containing the phonetic transcription of all the utterances; the labels are not yet time-aligned with the waveforms.Tip: if you want to design your own script later, the above command is the easiest way to convert text into a phone sequence, so that you can measure the coverage.
Forced alignment involves training HMMs, just as in automatic speech recognition. Therefore, the speech has to be parameterised. The features we will use are MFCCs.
Extracting MFCCs
bash$ make_mfccs alignment wav/*.wav
Doing the alignment
bash$ cd alignment
bash$ make_mfcc_list ../mfcc ../utts.data train.scp
bash$ do_alignment .
(Notice the space and the period after the last command!)
The
do_alignmentcommand will take a while to run (20 minutes or more) depending on the speed of the machine you are using and the amount of speech you recorded. Monitor it for the first 5 minutes or so to make sure there are no early problems.Once the alignment has completed, you need to split the resulting MLF – which will now contain the correct time alignments for the labels – into individual label files that Festival can use.
Splitting the MLF file
bash$ cd ..
bash$ mkdir lab
bash$ break_mlf alignment/aligned.3.mlf lab
You can examine the label files at this point, but be careful not to change anything.
Optional variations
Skip this part during your first voice build, and come back later, when you are ready to create variations on the basic voice.
Log in- Modify the do_alignment scriptOptionally, you can modify the do_alignment script, which will affect the quality of the forced alignment.
You can modify the
do_alignmentscript in order to experiment with the forced alignment. For example, if your alignment was already pretty good, you might modify the script to make the alignment worse, in order to examine what effect that has on the synthesis quality.To change the script, you first need to make your own copy of it. Find out where the script is:
$ which do_alignment
which will show you the full path to the script. Now, make a copy of it, and put that in your alignment directory:
$ cd alignment
$ cp /Volumes/Network/...use path from above.../do_alignment .
and now you can edit this script in your favourite editor. To run your version, rather than the central version, you need to run it like this:
$ cd alignment
$ ./do_alignment .
in step Doing the alignment.
Training on a subset of data, but aligning the whole database
You need to make a version of
train.scpfiles with only the list of MFCC files that you want to train the models on – let’s assume you’ve called thattrain_subset.scp. Now, you simply need to make sure that every execution of HCompV and HERest uses this smaller script file – for example:HERest -C config -T 1023 -t 250.0 150.0 1000.0 -H hmm${i}/MMF -H hmm0/vFloors -I aligned.0.mlf -M hmm$[$i +1] -S train_subset.scp phone_listChanging the number of mixture components
The default models have a mixture of 8 Gaussian components in the output probability density distributions. You can vary that number. HTK uses a method called “mixing up” to gradually increase the number of components. Here, we go from 1 to 2, then 3, 5 and finally 8 components. You can vary this by changing one line in the script:
# Increase mixtures.

for m in 2 3 5 8 ; do
...
Try using more or fewer components (possibly just one component) to see what effect this has.
Changing the vowel reductions
You don’t need to modify the
do_alignmentto achieve this – just edit thephone_substitutionsfile. Try removing all substitutions (i.e., makephone_substitutionsan empty file).
- Modify the do_alignment script
Related forums
-
- Forum
- Topics
- Last Post
-
-
Festival
Practical questions about the Festival speech synthesis toolkit.
- 68
- 4 weeks, 1 day ago
-
HTK
Practical questions about the Hidden Markov Model toolkit. Read the manual before posting!
- 14
- 5 months, 2 weeks ago
-
Festival
- Pitchmark the speechThe signal processing used for waveform concatenation is pitch-syncronous, so that requires the speech database to have the individual pitch periods marked.
make_pm_wavegenerates pitch marks from your waveforms:bash$ make_pm_wave -[mf] pm wav/*.wav bash$ make_pm_fix pm/*.pm
Note that
-[mf]means that you should specify either-mor-f, for male or female.make_pm_fixadjusts the pitch marks so they each align with a peak in the waveform.Optional: view the pitch marks
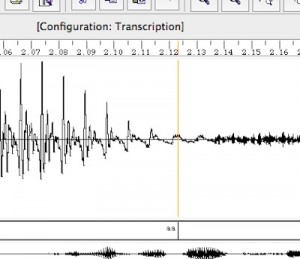
To view pitch marks (so that you can check they are accurate) you need to convert them into label files. These can then be viewed in wavesurfer along with the corresponding waveform.
bash$ mkdir pm_lab
bash$ make_pmlab_pm pm/*.pm
Optional: adjust the pitch marker settings
You might need to adjust some of the parameters of the pitch marker to make it work well on your voice. If you need to make changes, copy the script
$MBDIR/bin/make_pm_waveto yourssdirectory and make changes to your own copy. Then run the script as./make_pm_waveso that your version is run rather than the default version.Look for the
DEFAULT_PM_ARGSlines in the script. Theminandmaxvalues are minimum and maximum times between pitch marks (i.e., the pitch period, which is 1/F0). Thelx_lfandlx_hfvalues are frequency values in Hertz and control a filter which is used to remove both high and low frequencies before the actual pitchmarking is performed.If you decide to change the default values, you need to find out what the range of F0 is for your voice. You can use Praat’s edit command to examine a few waveforms along with pitch contours, and make a note of the maximum and minimum values you find (excluding any obvious errors made by Praat). Set the high and low frequency filters to just above and just below (maybe 40Hz either direction) this pitch range, as well as setting the appropriate
minandmaxvalues for your pitch range. Re-run the pitch marker and check the output again. You will need to convert the pitchmarks to label files in order to view them.It is helpful to remove the
-filloption when tuning the pitchmarker settings, and to re-instate it just before pitchmarking all your data at the end. For more tips try this short guide.Related forums
-
- Forum
- Topics
- Last Post
-
-
Signal processing
Questions about feature extraction, time and pitch modification, or anything else we can do to speech waveforms.
- 44
- 6 months, 2 weeks ago
-
Signal processing
-
- Build the voiceThe final stages of building the voice involve creating the information needed by the target and join costs, plus the representation of the speech needed for waveform generation.
We’re nearly there, and the remaining steps are mostly fully automatic.
Log in- Utterance structuresThe target cost in Festival is computed using linguistic information, so we need to provide that information for all the candidate units in the database. This information is stored in utterance structures.
The utterance structure for each of files in your database is where Festival stores all the linguistic information needed by the target cost, including the phonetic string, a tree structure that connects those phones with their parent syllables and words, and so on. We also add the phonetic timestamps obtained by forced alignment, to these structures.
First, build the utterance structures:
bash$ mkdir utt
bash$ festival $MBDIR/scm/build_unitsel.scm my_lexicon.scm
festival>(build_utts "utts.data" 'unilex-rpx)
Then run an analysis that checks the distribution of phone durations and labels any outliers:
bash$ mkdir dur
bash$ phone_lengths dur lab/*.lab
bash$ festival $MBDIR/scm/build_unitsel.scm
festival>(add_duration_info_utts "utts.data" "dur/durations")
- Pitch trackingOne component of the join cost is the fundamental frequency, F0. This is extracted separately from the pitch marks, although the two things are obviously closely related.
Whereas the pitch marks are required by the signal processing used for waveform generation, pitch contours (or more correctly, F0 contours) are required by the join cost.
bash$ mkdir f0
bash$ make_f0 -[mf] wav/*.wav
The
-fand-mflags control the pitch tracker settings. You can look in themake_f0if you want to see what they are. Choose-fif your voice has a pitch range typical of female speakers, or-mflag if your pitch range is typical of male speakers. Optionally (or come back to this step later), you could even make your own copy of themake_f0script and directly modify the various pitch tracker settings to match your own pitch range (talk to a tutor in the lab first to be sure you understand exactly what they are, what units they are in, and so on).Related posts
- Join cost coefficientsThe join cost measures potentially-audible mismatch at the points where candidate units from the database are joined. To make the runtime synthesis faster, we can precompute the acoustic features that are used by the join cost.
Festival’s join cost measures mismatch in both the spectrum (represented as MFCCs) and F0. So, we will now normalise and combine MFCCs and F0 into a single file per utterance:
bash$ mkdir coef
bash$ make_norm_join_cost_coefs coef f0 mfcc '.*.mfcc'
and, since the join cost is only ever evaluated using the first and last frames in each candidate unit, those files can now be stripped of all values that are not close to diphone boundaries; this makes them much smaller and therefore faster to load into Festival:
bash$ mkdir coef2
bash$ strip_join_cost_coefs coef coef2 utt/*.utt
- Waveform representationAlthough unit selection is essentially the concatenation of pre-recorded waveform fragments, we may store those waveforms in terms of source-filter model parameters.
The representation of speech that Festival uses at synthesis time is Residual-excited Linear Prediction Co-efficients (RELP). This allows for the possibility of manipulating the spectrum and F0 (for example, at concatenation points) as well as duration. However, in practice, Festival’s Multisyn engine does not actually do any of those things.
bash$ mkdir lpc
bash$ make_lpc_from_wav wav/*.wav
- Utterance structures
- Run the voiceWe're done! Time to find out what it sounds like...
To run the voice, start Festival and load the voice as follows (changing
rpxtoediorgamif appropriate):bash$ festival festival>(voice_localdir_multisyn-rpx) festival>(SayText "Hello world.")
- Improvements and variationsIt would take too long to tune every aspect of the system, but we can still identify some problems and see how to fix them. It's also easy to vary the contents of the database to discover the effect on the synthetic speech.
So far, we have just built a single voice. It would be good to have something to compare that against.
The methodology to use in this part is to create multiple versions of your voice, and then to compare them informally or in a listening test.
The way to have multiple voices is to make a complete copy of your
ssfolder for each variant (you should move the originalrecordingselsewhere first (to save space). You should also use symbolic links so that all the variants share the samewav,mfcc, andlpcfolders. Not only does this save even more space, it is also good engineering practice to avoid unnecessary copies of data.The first thing to try is to revisit each of the stages in building the voice, and see whether there is anything you can improve. For example, you could adjust the pitchmarking parameters to more closely fit your voice. Then, try some or all of the following variations:
Log in- Find and fix a labelling errorTo see, in principle, how we could improve the labels for the whole voice, we will just identify and then fix a single label alignment error.
A label alignment error means that the start or end time of a phone label is wrong. Small errors are not the main problem, because we derive diphone boundaries from these phone boundaries.
What to listen for
You should listen for a substantial error which leads to either a sound missing from a synthetic utterance or (and this is easier to hear) an extraneous sound inserted. Find a nice short test sentence that contains such an error.
Very occasionally, the forced alignment works so well that you may find it hard to identify an obvious error, so limit the amount of time you spend looking for one. If you think you’ve got a voice with no alignment errors, lucky you, but send me some audio samples for checking – the chances are that you are wrong!
How to find out which units were used to synthesise a sentence
festival> (set! myutt (SayText "Hello world."))
festival> (utt.relation.print myutt 'Unit)
then look for the source_utt and source_end features to find the utterance and location of each diphone. Decide which of these utterances must contain the mis-aligned label.
How to correct the error
The label files from forced alignment will contain many sp (short pause) labels of zero duration. Wavesurfer does not handle these correctly, so you need to manually remove these zero-duration sp labels (using a plain text editor such as Aquamacs) first. You only need to do this for an utterance for which you wish to correct the label alignments. Load the waveform and the labels for the utterance into Wavesurfer. Now, you should move the label times earlier or later, to the correct alignment with the waveform. Do not change their names; do not add or delete any labels. Save the labels and quit Wavesurfer. Repeat this procedure for any other utterances that you need to correct.
You now need to rebuild the utterance structures, to incorporate the new label times. You will also need to rebuild the stripped join cost coefficients.
Evaluating the effect of fixing the error
Fixing a single error won’t have a measurable effect on the average quality of the voice, so you shouldn’t try to measure any improvement in a formal listening test. Make an informal assessment and decide whether you fixed the error.
Moving a phone label boundary might lead to the unit selection algorithm choosing a different unit sequence, possibly not including the unit you just corrected!
To get around this, you can force Festival to only select from the same database utterances as before you made the correction:
- Make a new utts.data file listing only those utterances
- Fix the error and rebuild the voice
- Run Festival using the new utts.data file
- Vary the contents of the databaseMake some simple variations on your voice, by excluding parts of the database.
If you are making several variants with and without your additional sentences, think about whether you should keep the total size of the database the same in all cases.
Exclude data the simple way
This is as simple as commenting out lines in
utts.data– just put a semicolon at the start of the line:( arctic_a0001 "Author of the danger trail, Philip Steels, etc." ) ( arctic_a0002 "Not at this particular case, Tom, apologized Whittemore." ) ; ( arctic_a0003 "For the twentieth time that evening the two men shook hands." )
You can now restart Festival and load the voice.
Exclude data the correct way
The simple method above is acceptable for the purposes of this exercise. But, it won’t reveal the full effect of a smaller database because the alignment of the labels is not changed. A smaller database will also have an impact (probably negative) on the quality of the alignments, so the correct way to remove utterances is to actually delete the lines from
utts.data(make a backup copy first) and re-run the forced alignment. You will then need to rebuild the utterance structures to incorporate the new label timestamps.(There is no need to re-run the pitch marking, F0 estimation, MFCC extraction, or LPC stages)
- Introduce deliberate errorsBy deliberately varying some aspects of the system, you can discover how much effect they have on the overall quality of the voice.
A nice technique that you can use to discover the importance (or otherwise) of some aspects of the system is to deliberately introduce errors. Here are some ideas to get you started:
- produce less accurate pitch marks by varying the parameters to the pitch marker
- investigate the effect of alignment quality independently from database size: train the HMMs used for alignment on only a subset of the data, then use them to align the whole database (requires modifications to the
do_alignmentscript) - investigate the effectiveness of the vowel reduction stage in forced alignment (requires modifications to the
phone_substitutionsfile in thealignmentfolder) - use the ‘wrong’ dictionary
- Target cost weightAdjust the relative weight between the target and join cost.
festival> (du_voice.set_target_cost_weight currentMultiSynVoice 0.5)
where 0.5 is the weight of the target cost relative to the join cost (default value is 1.0). A target cost weight of zero effectively turns it off altogether and the search will only use the join cost(*). Conversely, a very large target cost weight will mean that the join cost has little effect and candidates will be chosen based on their linguistic features only.
(*) But remember two things:
- candidates are pre-selected on their base diphone type, so that will always match even without any target cost
- candidate lists are pruned based on the target cost, before the search commences, so the target cost will still have an effect – unless you turn off this observation pruning.
- Join sub-cost weightingVary the relative weightings of the join sub-cost component (F0, power, spectrum).
The default weights are all 1.0 (the features have already been normalised to unit variance)
F0 weight:
festival> (du_voice.set_jc_f0_weight currentMultiSynVoice 0.5)
Power weight:
festival> (du_voice.set_jc_power_weight currentMultiSynVoice 0.5)
Spectral weight:
festival> (du_voice.set_jc_spectral_weight currentMultiSynVoice 0.5)
Setting a weight to 0.0 means that the join cost effectively ignores that acoustic feature.
- PruningFestival's Multisyn unit selection engine prunes the candidate lists, and performs more pruning during the search.
Here you can try modifying the various pruning parameters of Festival’s Multisyn unit selection engine, after loading a Multisyn voice. Pruning is used for two reasons: to reduce the amount of computation, and to eliminate the worst candidates. Therefore, pruning will affect both speed and quality and you will want to examine its effect on both. A useful command is
time.Observation pruning
This pruning is performed on the list of candidates before the Viterbi search commences. It discards candidates with target costs greater than the beam width. Making this beam very narrow means that the remaining candidates will all have low target costs, which is good, but that the subsequent Viterbi search will not have much choice and so may not be able to find a sequence with low join costs.
festival> (du_voice.set_ob_pruning_beam currentMultiSynVoice 0.6)
where 0.6 is the beam width (you can vary this between 0 and 1). The default beam width is 0.25.
Beam pruning
This pruning happens within the Viterbi search. Making this beam narrow will make the search less exact and increases the risk that the sequence of units found will not actually be the one with the lowest overall cost.
festival> (du_voice.set_pruning_beam currentMultiSynVoice 0.2)
where 0.2 is the beam width (you can vary this between 0 and 1). The default beam width is 0.25.
- Find and fix a labelling error
- EvaluationThe main form of evaluation should be a listening test with multiple naive listeners. But there are other ways to evaluate, and potentially to improve, your voice.
How to save a synthesised waveform
festival> (set! myutt (SayText "Hello world."))
festival> (utt.save.wave myutt "myutt.wav" 'riff)
and of course you can change myutt.wav to any other name you like (but always keep the .wav suffix).
Use the forum to find out more about tools for running an evaluation.
Log in - Writing upBecause you kept such great notes in your logbook (didn't you?), writing up will be easy and painless.
Writing up your report is an exercise in following a specific style guide, as you would have to do for a published paper.
Formatting
Your report must conform to the following specification:
- Use IEEE Transactions double-column style, with single line spacing
- Templates for Latex and Microsoft Word can be found the IEEE template selector here :
- To obtain a zip file of the, e.g. LaTeX, template files select: Transactions, Journals Letters > IEEE/ACM Transactions on Audio, Speech, and Language Processing > Original Research > LaTeX
- If you are using LaTeX (very strongly recommended), use the
bare_jrnl.textemplate. - Follow the style as closely as you can, including the in-text citations and references.
- Replace the author name on the first page with your exam number + wordcount, and omit the author profile and photograph on the last page.
- Include the abstract and index terms.
- Your report should have the same format as the PDF versions of published papers: Example 1; Example 2; Example 3.
- Templates for Latex and Microsoft Word can be found the IEEE template selector here :
You should ensure that figures and graphs are large enough to read easily and are of high-quality (with a very strong preference for vector graphics, and failing that high-resolution images). It is recommended to use single-column figures as far as possible. However, a small number of large figures or table may be included at full page width, spanning both columns, if they are at the top or bottom of a page.
Length
- Word limit: 5000 words
- including: headings, footnotes, words within figures & tables; captions
- excluding: numerical data within figures and tables; references
- Page limit: no limit enforced, but typical papers will be 7 or 8 pages long
- Figures, graphs, & tables: no limit on number (but excessive or unnecessary ones may impact your mark in the “Scientific writing” category)
The word limit is a hard limit. The markers will simply not read anything beyond these limits, and your mark will only be based on what they read.
Originality
The rules on originality for this assignment are strict, so that you have to explain everything your own way. That will help you learn better. The rules are stricter than for most academic journals, and that is intentional.
These rules are not designed to trick you or catch you out. They are designed to make you focus on your own understanding of the material.
All material (including text, figures, graphs, plots, tables, etc) must be your own original work. You must not include (even with proper attribution) any material from other sources.
These are not acceptable:
- Using a figure from another paper, or one of your own from a previous assignment
- Quotes, even if properly marked as such and with attribution
- Citing something without reading it (e.g., because you found it referenced in some other source)
whilst the following are acceptable:
- Your own explanations, in your own words, of concepts and ideas from other sources (with appropriate attribution of whose ideas those are, typically by citation)
I encourage you to ask for clarification on the private forums, if you need it.
Marking scheme
You must read the structured marking scheme (this document has been updated for 2023-24) because it will help you focus your effort and decide how much to write in each section of your report.
Then design a structure for your report that is consistent with the marking scheme, but do not simply copy the marking scheme sections as your headings because that is not the best structure.
A well-structured report will be awarded marks under “Scientific writing”. Making the relationship between your report structure and the marking scheme clear will help the marker find all the places they can give you marks.
Submission
- do not include your name or student number anywhere in your report
- submit a single document in PDF format via Learn; the file name must be in the format examnumber_wordcount.pdf (e.g., “B012345_4672.pdf”)
- state your word count on the first page of the report (e.g., “wordcount: 4672”)
Your work may be marked electronically or we may print hardcopies on A4 paper, so it must be legible in both formats. In particular, do not assume the markers can “zoom in” to make the figures larger.
Recommendations
You should also check out the writing tips provided for the Festival exercise from Speech Processing – they apply equally well here – and please use the forums to obtain general advice on scientific writing.
Related forums
-
- Forum
- Topics
- Last Post
-
-
Scientific writing
Ask about style, formatting, grammar, formality, or any other writing topic.
- 32
- 3 weeks, 5 days ago
-
Scientific writing
- Use IEEE Transactions double-column style, with single line spacing